


From JPG to DST: The Top File Converters for Embroidery Machines
Need to convert JPG to DST for embroidery? Discover the best file converters—both free and paid—that deliver flawless stitch files every time
Introduction
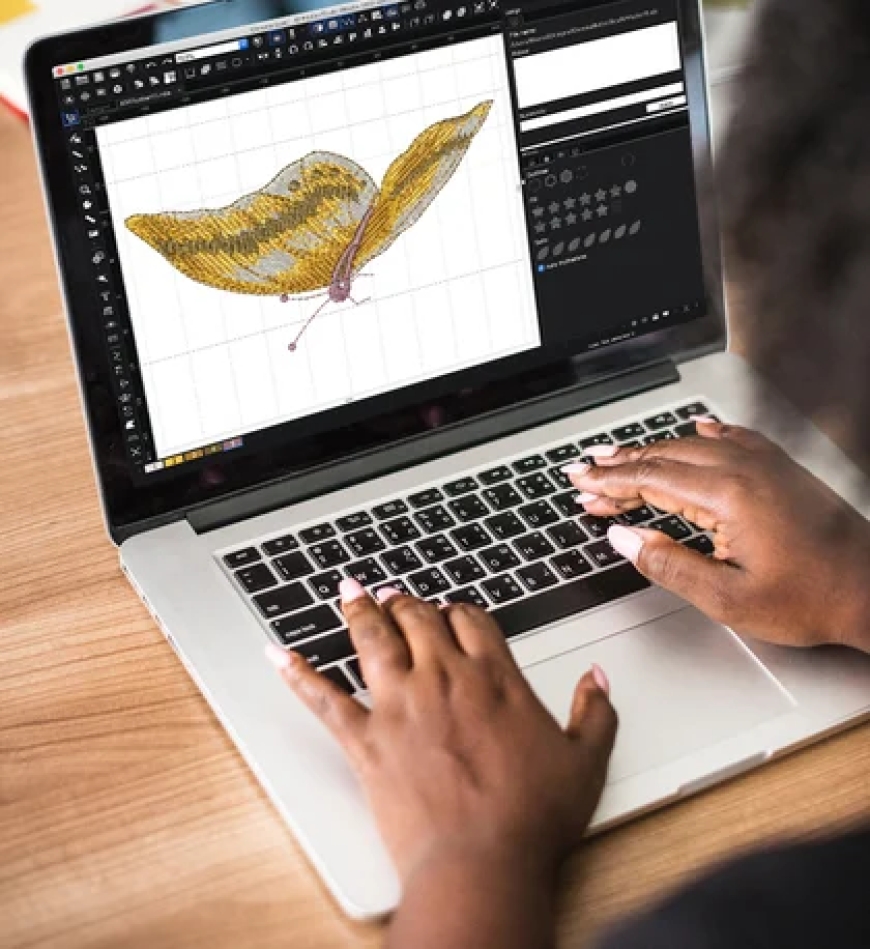
You've got the perfect JPG designmaybe a logo, artwork, or custom graphicand you're ready to embroider it. But your embroidery machine doesn't read JPGs. It needs a DST file, the industry-standard format for most commercial embroidery machines.
This is exactly why you need the best DST file convertergeneric image tools just won't cut it. Converting JPG to DST isn't as simple as clicking "Save As," and using the wrong converter often produces files that cause thread breaks, uneven stitches, or missing details. The best DST file converter will preserve your design's quality while creating machine-ready embroidery files.
Without the best DST file converter for the job, you're risking wasted time, materials, and plenty of frustration. In this guide, we'll show you which converters actually work and how to avoid common conversion pitfalls.
In this guide, well break down:
-
Why converting JPG to DST is tricky(and why free tools often fail)
-
The best DST file converters(free, paid, and online options)
-
Step-by-step conversion tipsfor the cleanest results
-
When to hire a proinstead of DIY-ing it
By the end, youll know exactly how to turn any JPG into aflawless DST filewithout the headaches.
Why You Cant Just Convert JPG to DST
Before we dive into tools, lets clarify why this process isnt straightforward:
| JPG Files | DST Files |
|---|---|
| Made of pixels | Made of stitch commands |
| No stitch data | Contains needle paths, thread changes, and machine instructions |
| Any program can open them | Only embroidery software/machines can read them |
The Problem:Most free "JPG to DST" converters just overlay stitches on pixels, leading to:
? Uneven stitching
? Thread breaks
? Missing details
? Machine errors
To get atrue DST file, you needembroidery digitizing softwarenot a generic image converter.
The Best JPG-to-DST File Converters (Tested & Ranked)
1. Wilcom EmbroideryStudio (Paid Professional Grade)
Best for:Businesses and serious embroiderers
Price:$$$ (Subscription-based)
Key Features:
-
Industry-leading auto-digitizing
-
Advanced stitch editing tools
-
Perfect for complex designs
How to Convert JPG to DST:
-
Import JPG into Wilcom.
-
Use auto-digitize or manually trace stitches.
-
Adjust stitch density and underlay.
-
Export as DST.
2. Hatch Embroidery (Paid User-Friendly)
Best for:Small businesses and hobbyists
Price:$$ (One-time purchase)
Key Features:
-
Great auto-digitizing for beginners
-
Supports multi-hoop designs
-
Regular software updates
How to Convert JPG to DST:
-
Open JPG in Hatch.
-
Run auto-digitize (tweak settings if needed).
-
Export as DST.
3. Ink/Stitch (Free For DIYers)
Best for:Hobbyists on a budget
Price:Free (Inkscape plugin)
Key Features:
-
Manual digitizing control
-
Works with vector files (better than JPG)
-
Steep learning curve
How to Convert JPG to DST:
-
Convert JPG to SVG first (for cleaner edges).
-
Trace design in Inkscape.
-
Use Ink/Stitch to generate stitches.
-
Export as DST.
4. Embrilliance (Paid Mac-Friendly)
Best for:Mac users and monogramming
Price:$$ (Modular pricing)
Key Features:
-
Simple interface
-
Great for lettering and small designs
-
Supports DST export
How to Convert JPG to DST:
-
Import JPG into Embrilliance.
-
Use auto-digitize or manual tools.
-
Export as DST.
5. MyEditor (Free Online Tool Use Caution)
Best for:Quick, simple conversions
Price:Free
Key Features:
-
No software install needed
-
Decent for basic shapes/text
-
Limited control over stitches
How to Convert JPG to DST:
-
Upload JPG to MyEditor.
-
Adjust basic settings.
-
Download DST file.
??Warning:Test stitch first! Online converters often produce low-quality files.
Step-by-Step: Converting JPG to DST the Right Way
For thecleanest results, follow this pro method:
1. Prep Your JPG
-
Simplify the design(remove backgrounds, increase contrast).
-
Resize(4x4 inches or smaller works best).
-
Convert to black & white(helps with stitch mapping).
2. Choose Your Software
-
Forbest quality:Use Wilcom or Hatch.
-
Forbudget option:Try Ink/Stitch (with SVG conversion first).
3. Digitize the Design
-
Auto-digitize(for simple designs).
-
Manually trace(for complex artwork).
-
Adjust stitch density(0.4mm0.6mm for most fabrics).
4. Export as DST
-
Select "DST" as the output format.
-
Verify the file size (should be 50KB5MB).
5. Test Stitch!
-
Run on scrap fabric.
-
Look for thread breaks, gaps, or distortion.
-
Tweak settings if needed.
When to Hire a Professional Digitizer
DIY conversion works for simple designs, buthire a pro if:
? Your design hassmall text or fine details.
? Youre embroideringstretchy or tricky fabrics.
? Youreselling products(quality matters).
? Youvealready wasted materialson failed attempts.
Cost:Typically$10$30 per design(saves money long-term).
Common JPG-to-DST Conversion Mistakes (And Fixes)
? Mistake: Using Low-Quality JPGs
Fix:Start with high-resolution (300+ DPI) images.
? Mistake: Skipping the Test Stitch
Fix:Always stitch on scrap fabric first.
? Mistake: Overlooking Stitch Density
Fix:Reduce density for stretchy fabrics; increase for stability.
? Mistake: Relying on Free Online Converters
Fix:Use dedicated embroidery software for reliable results.
Conclusion
Converting JPG to DST isnt magicitsdigitizing. While free tools tempt with quick fixes, they often produce unstitchable files. Forflawless results:
-
Use proper embroidery software(Wilcom, Hatch, or Ink/Stitch).
-
Simplify your designbefore converting.
-
Test stitchbefore committing to final products.
For one-off projects,affordable digitizing servicesare worth every penny. Now that you know the best tools and techniques, youre ready tostitch perfect designs every time!